how to
photograph
wild birds

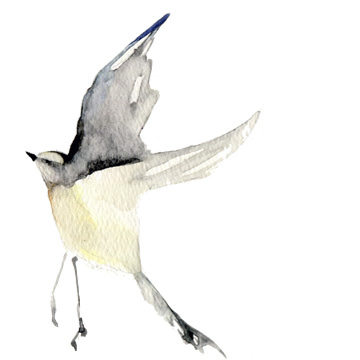
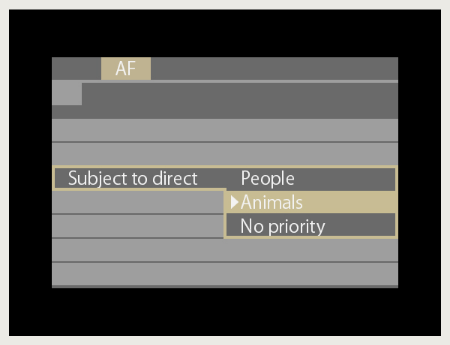
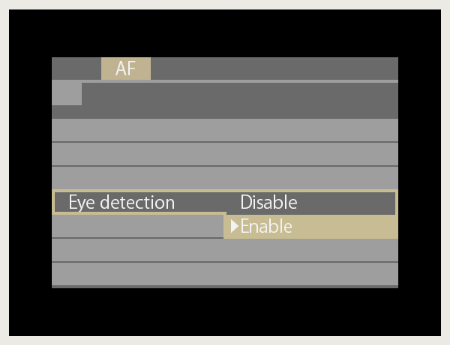
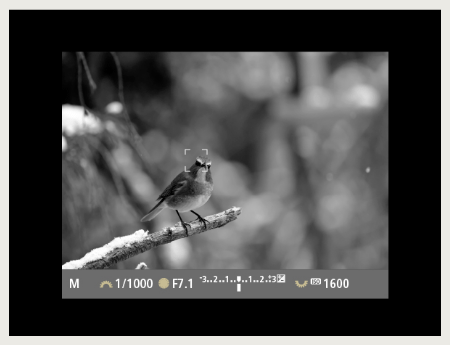
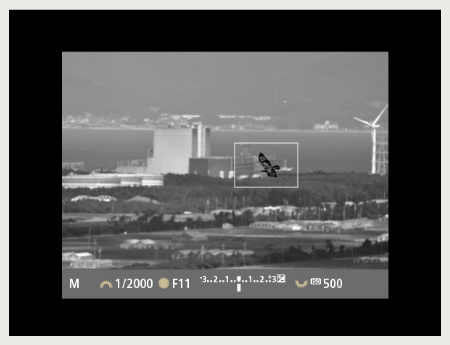
Utilize the Eye AF setting for animals

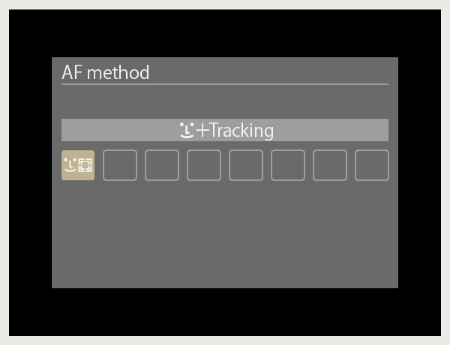
The most difficult thing in wild bird photography is to achieve a sharp focus on small birds. Recently, digital cameras have a tracking function that, if set in advance, automatically focuses on the eye of the bird simply by pointing the lens at it.

Image
Oriental Honey Buzzard
Enlarge

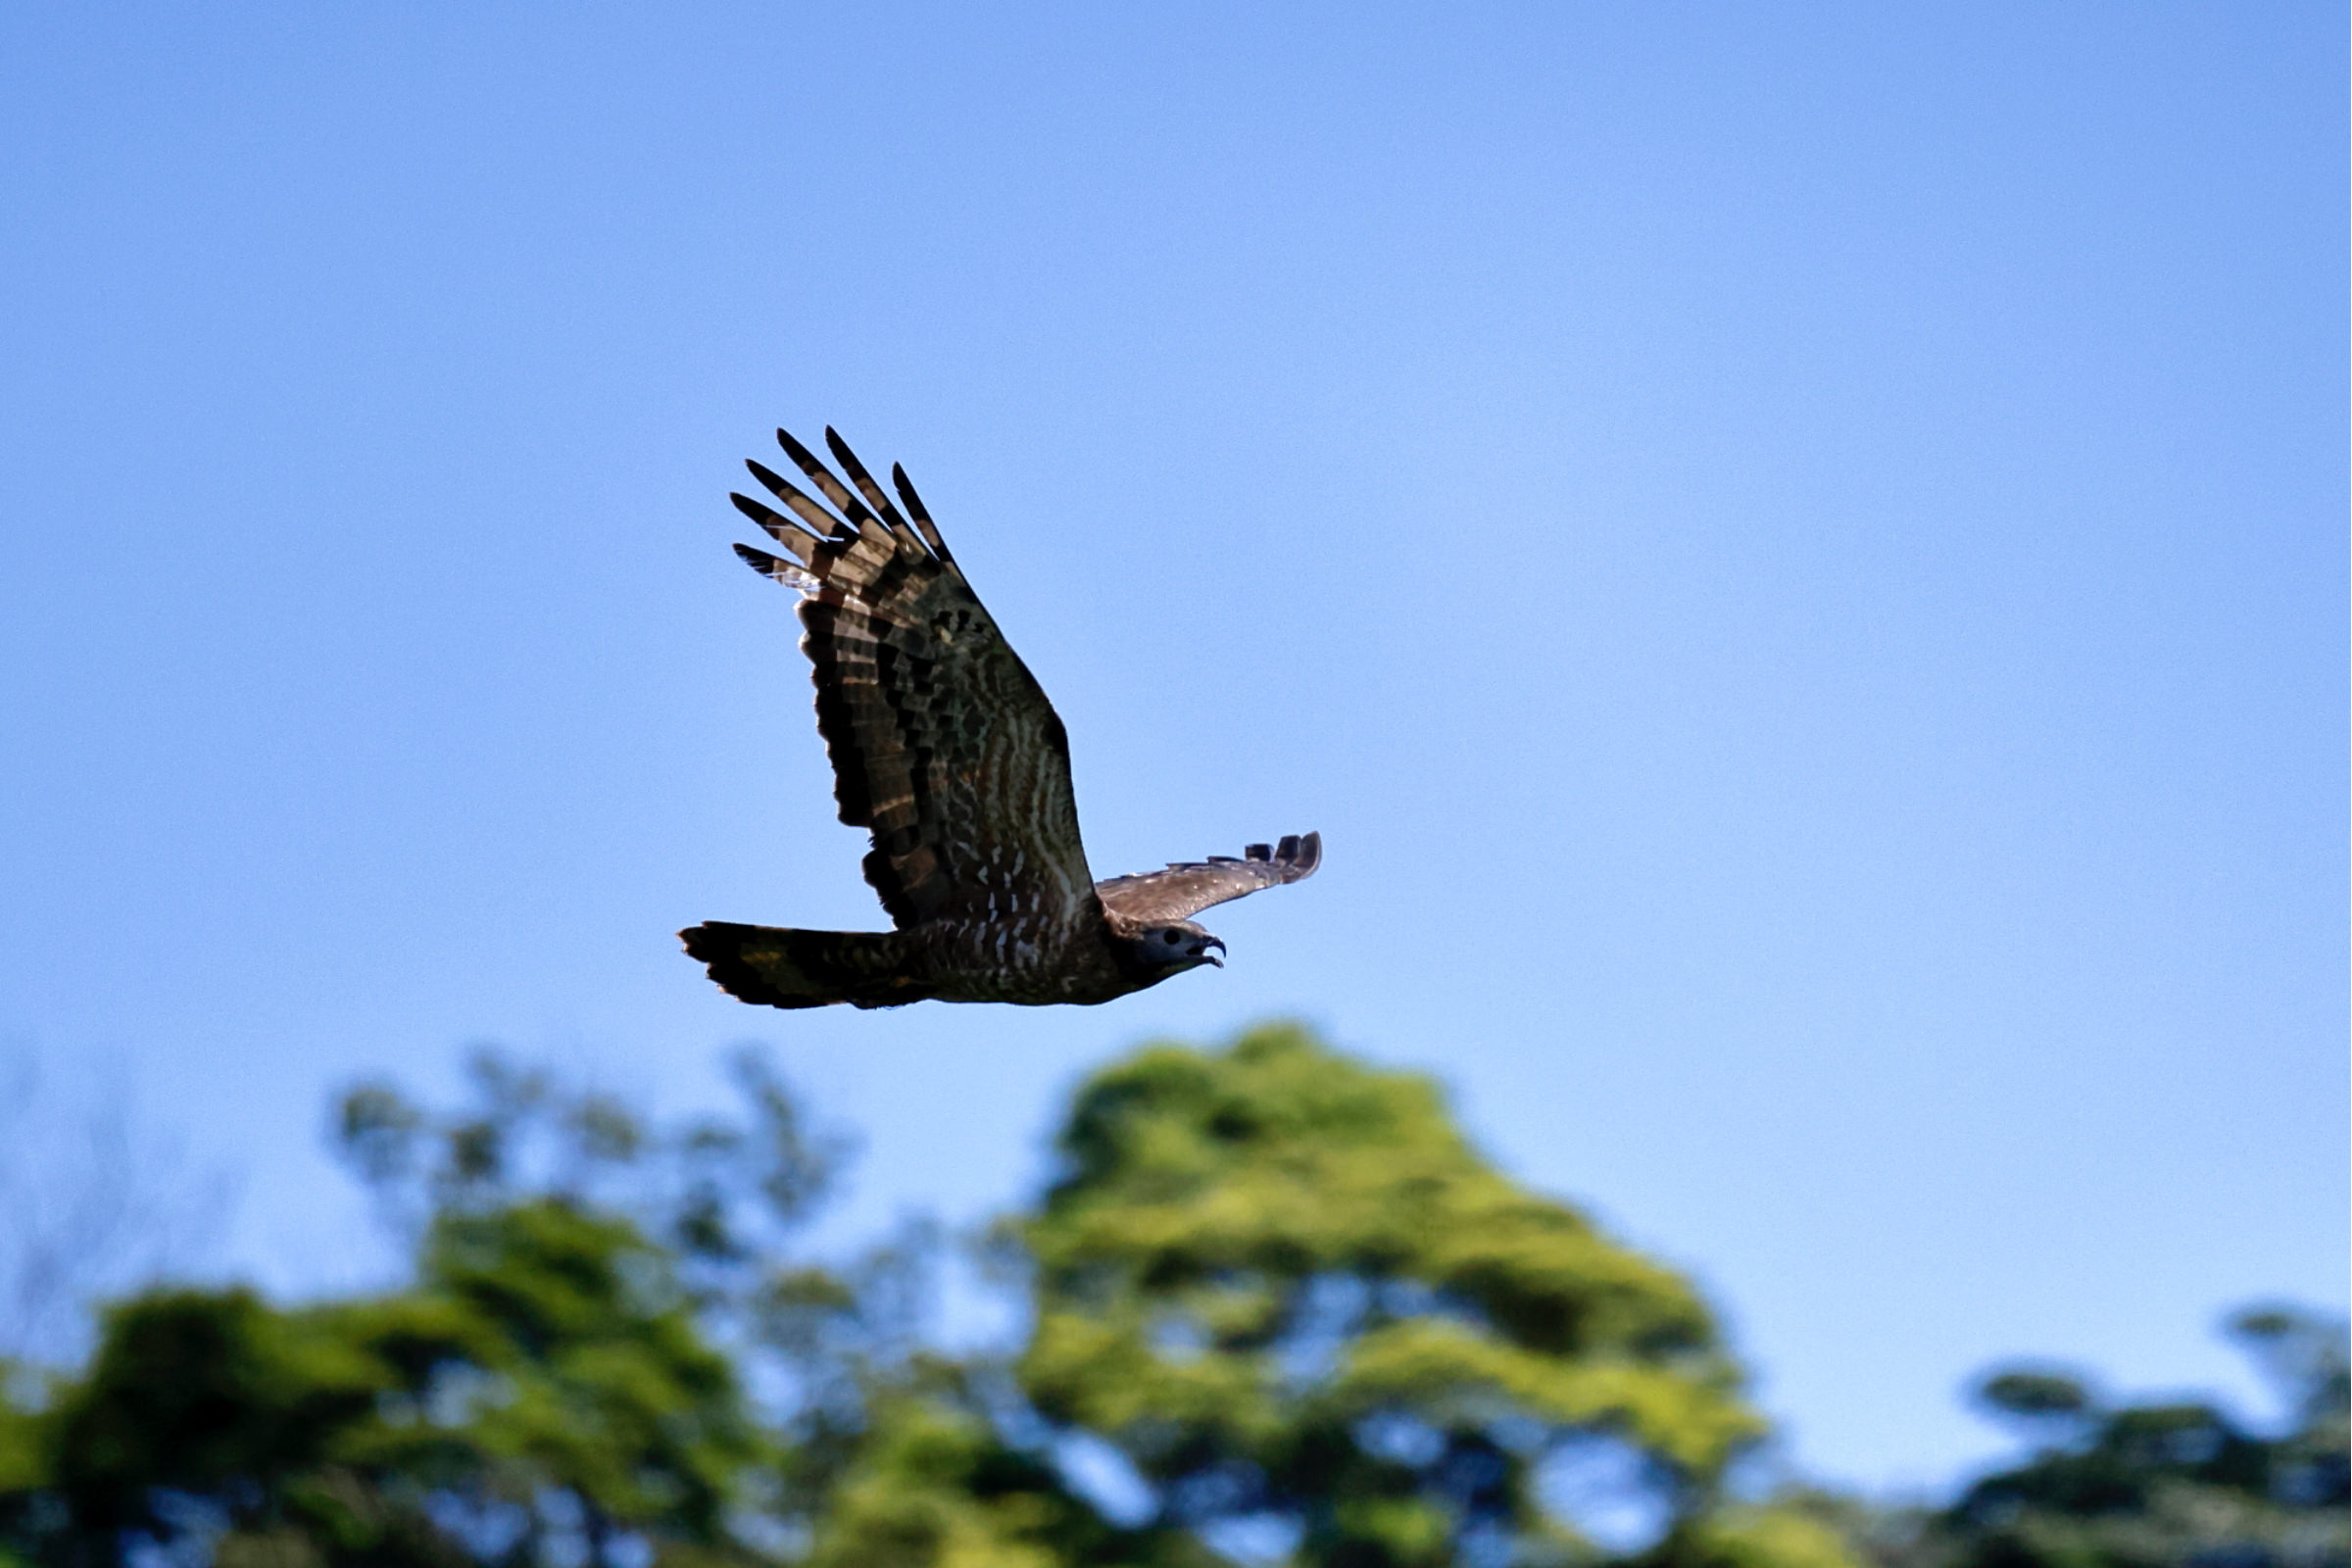
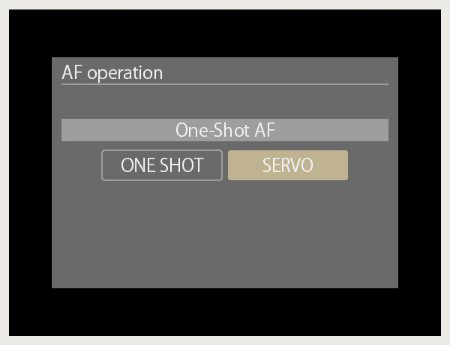
When you press the <AF-ON> button, Eye AF does the focusing for you, but there is a trick to it when birds are in flight. It is best to focus when you have a clear shot, with nothing in the sky that is blocking or obstructing it.
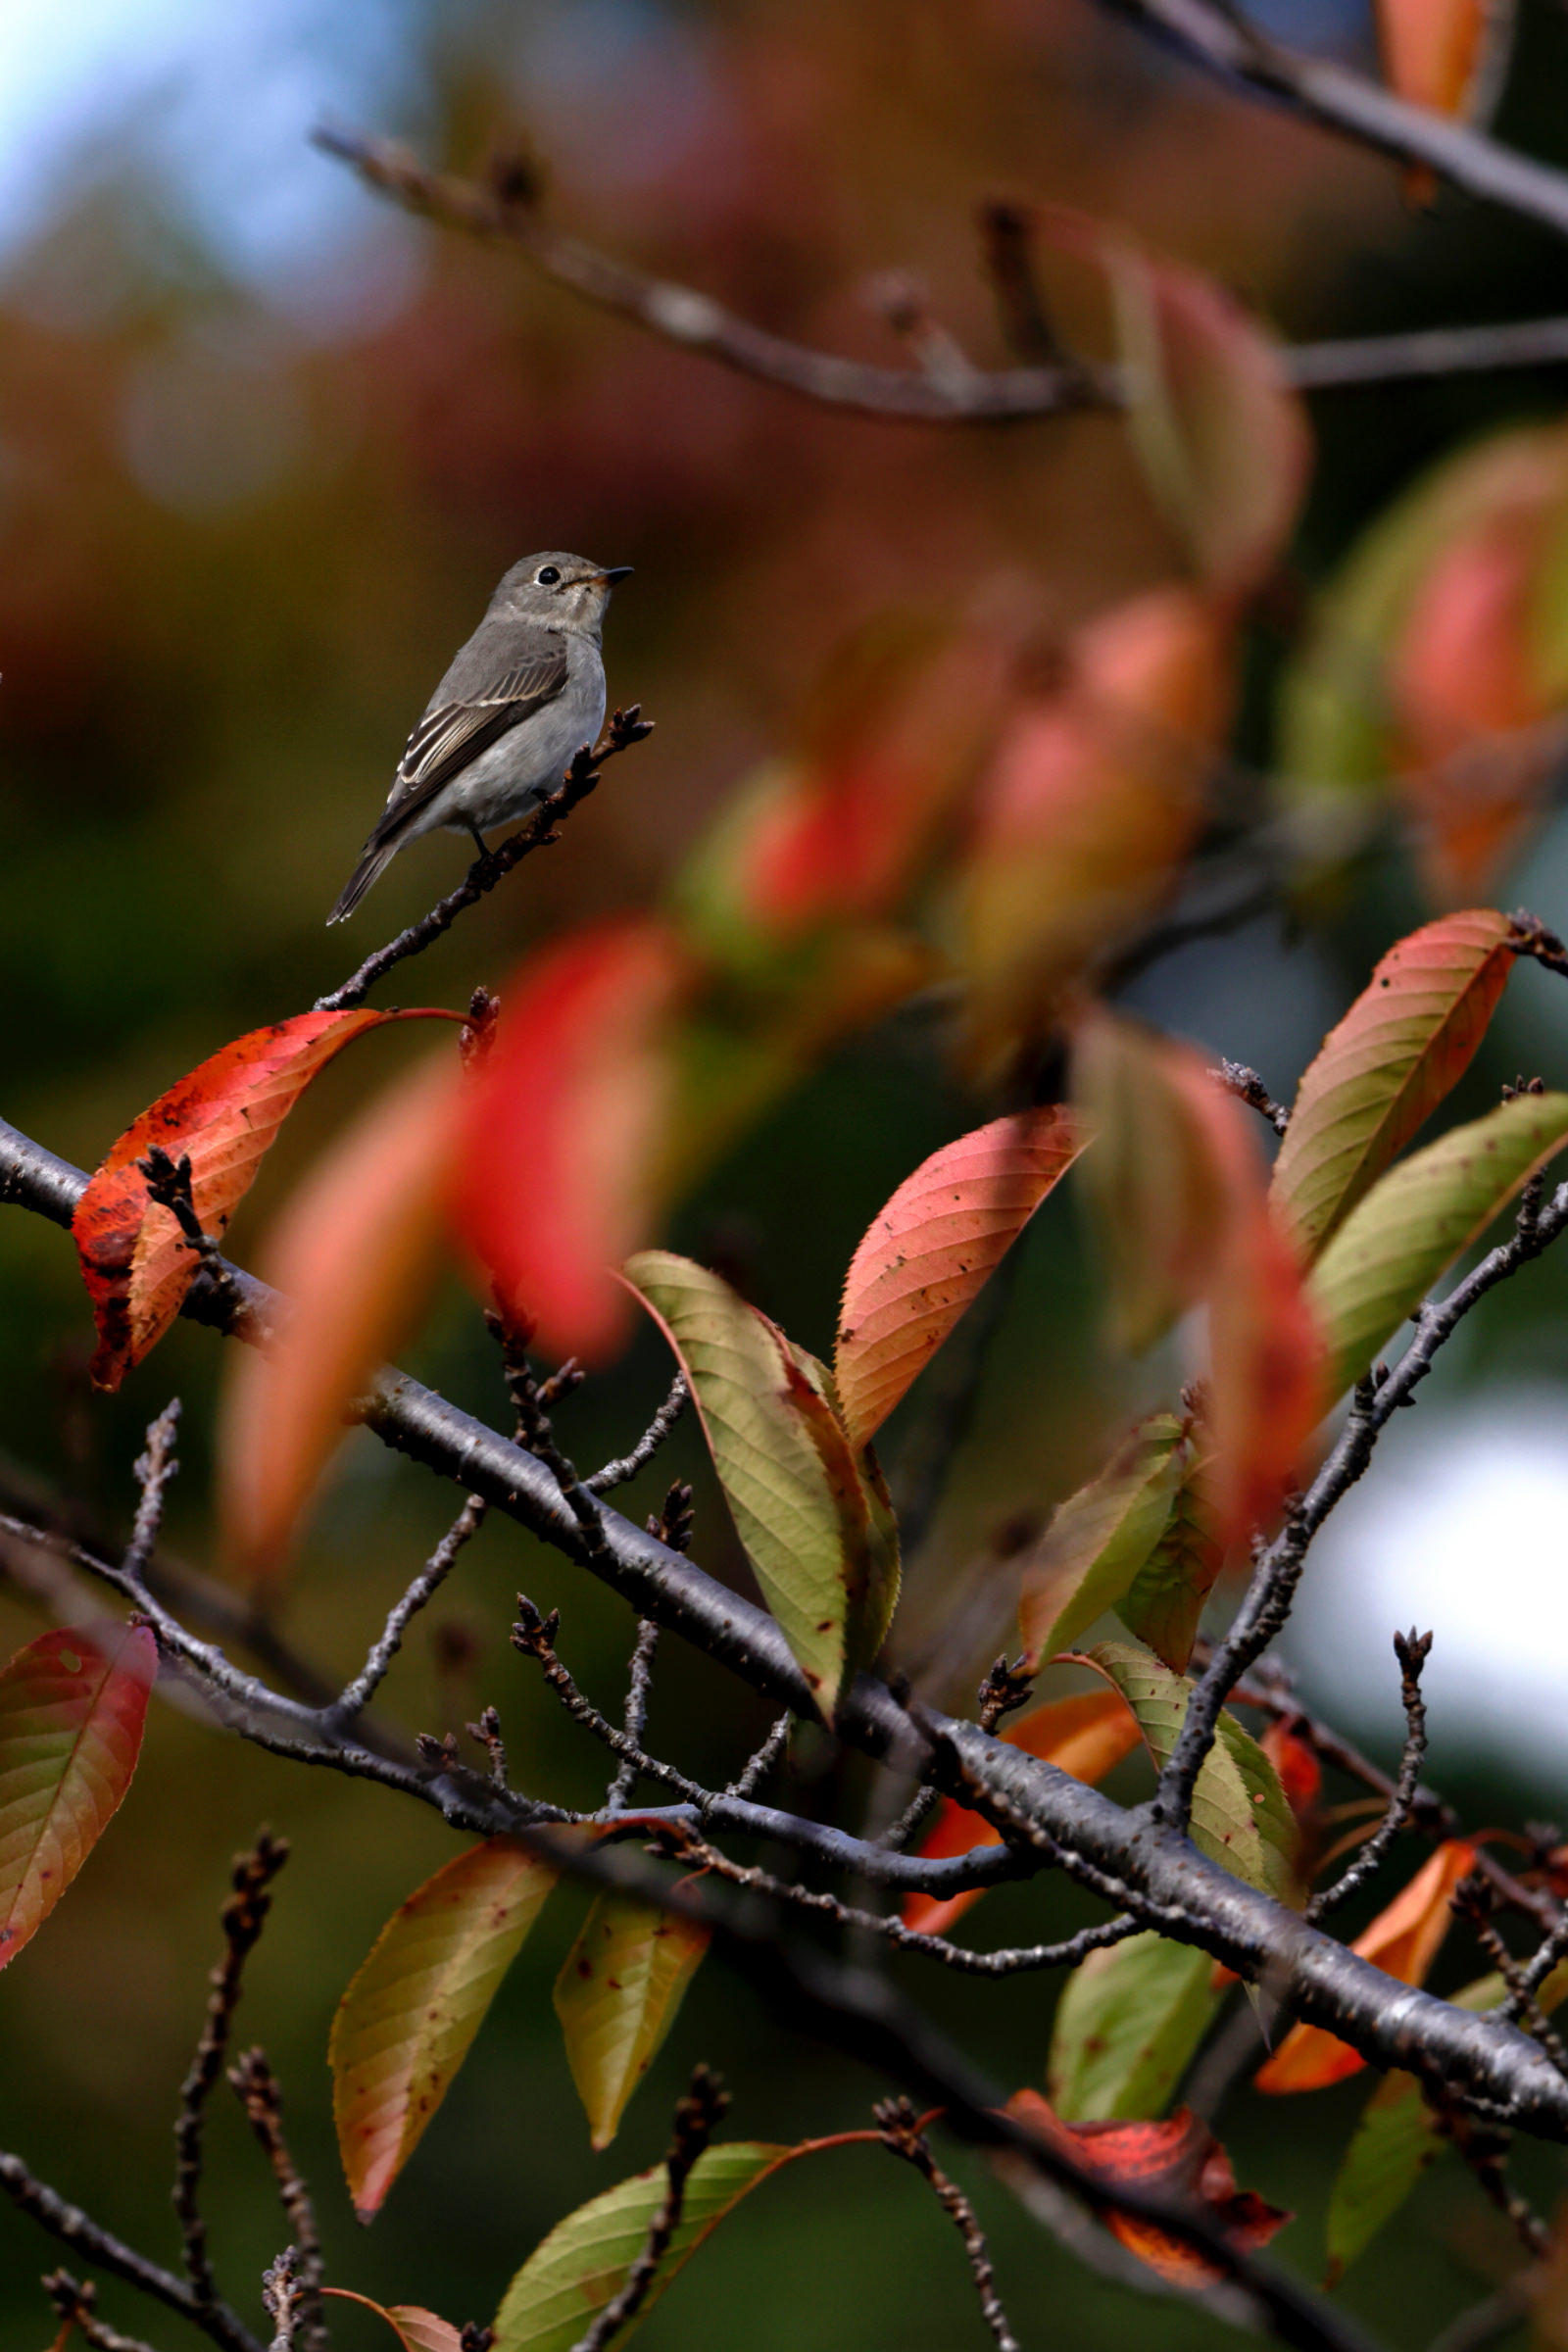
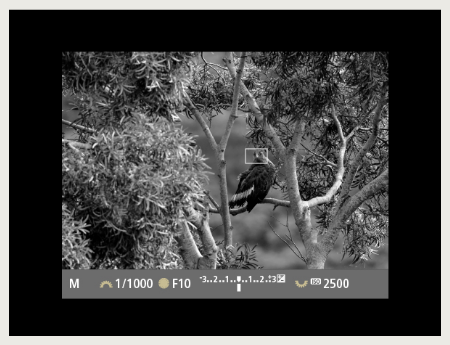
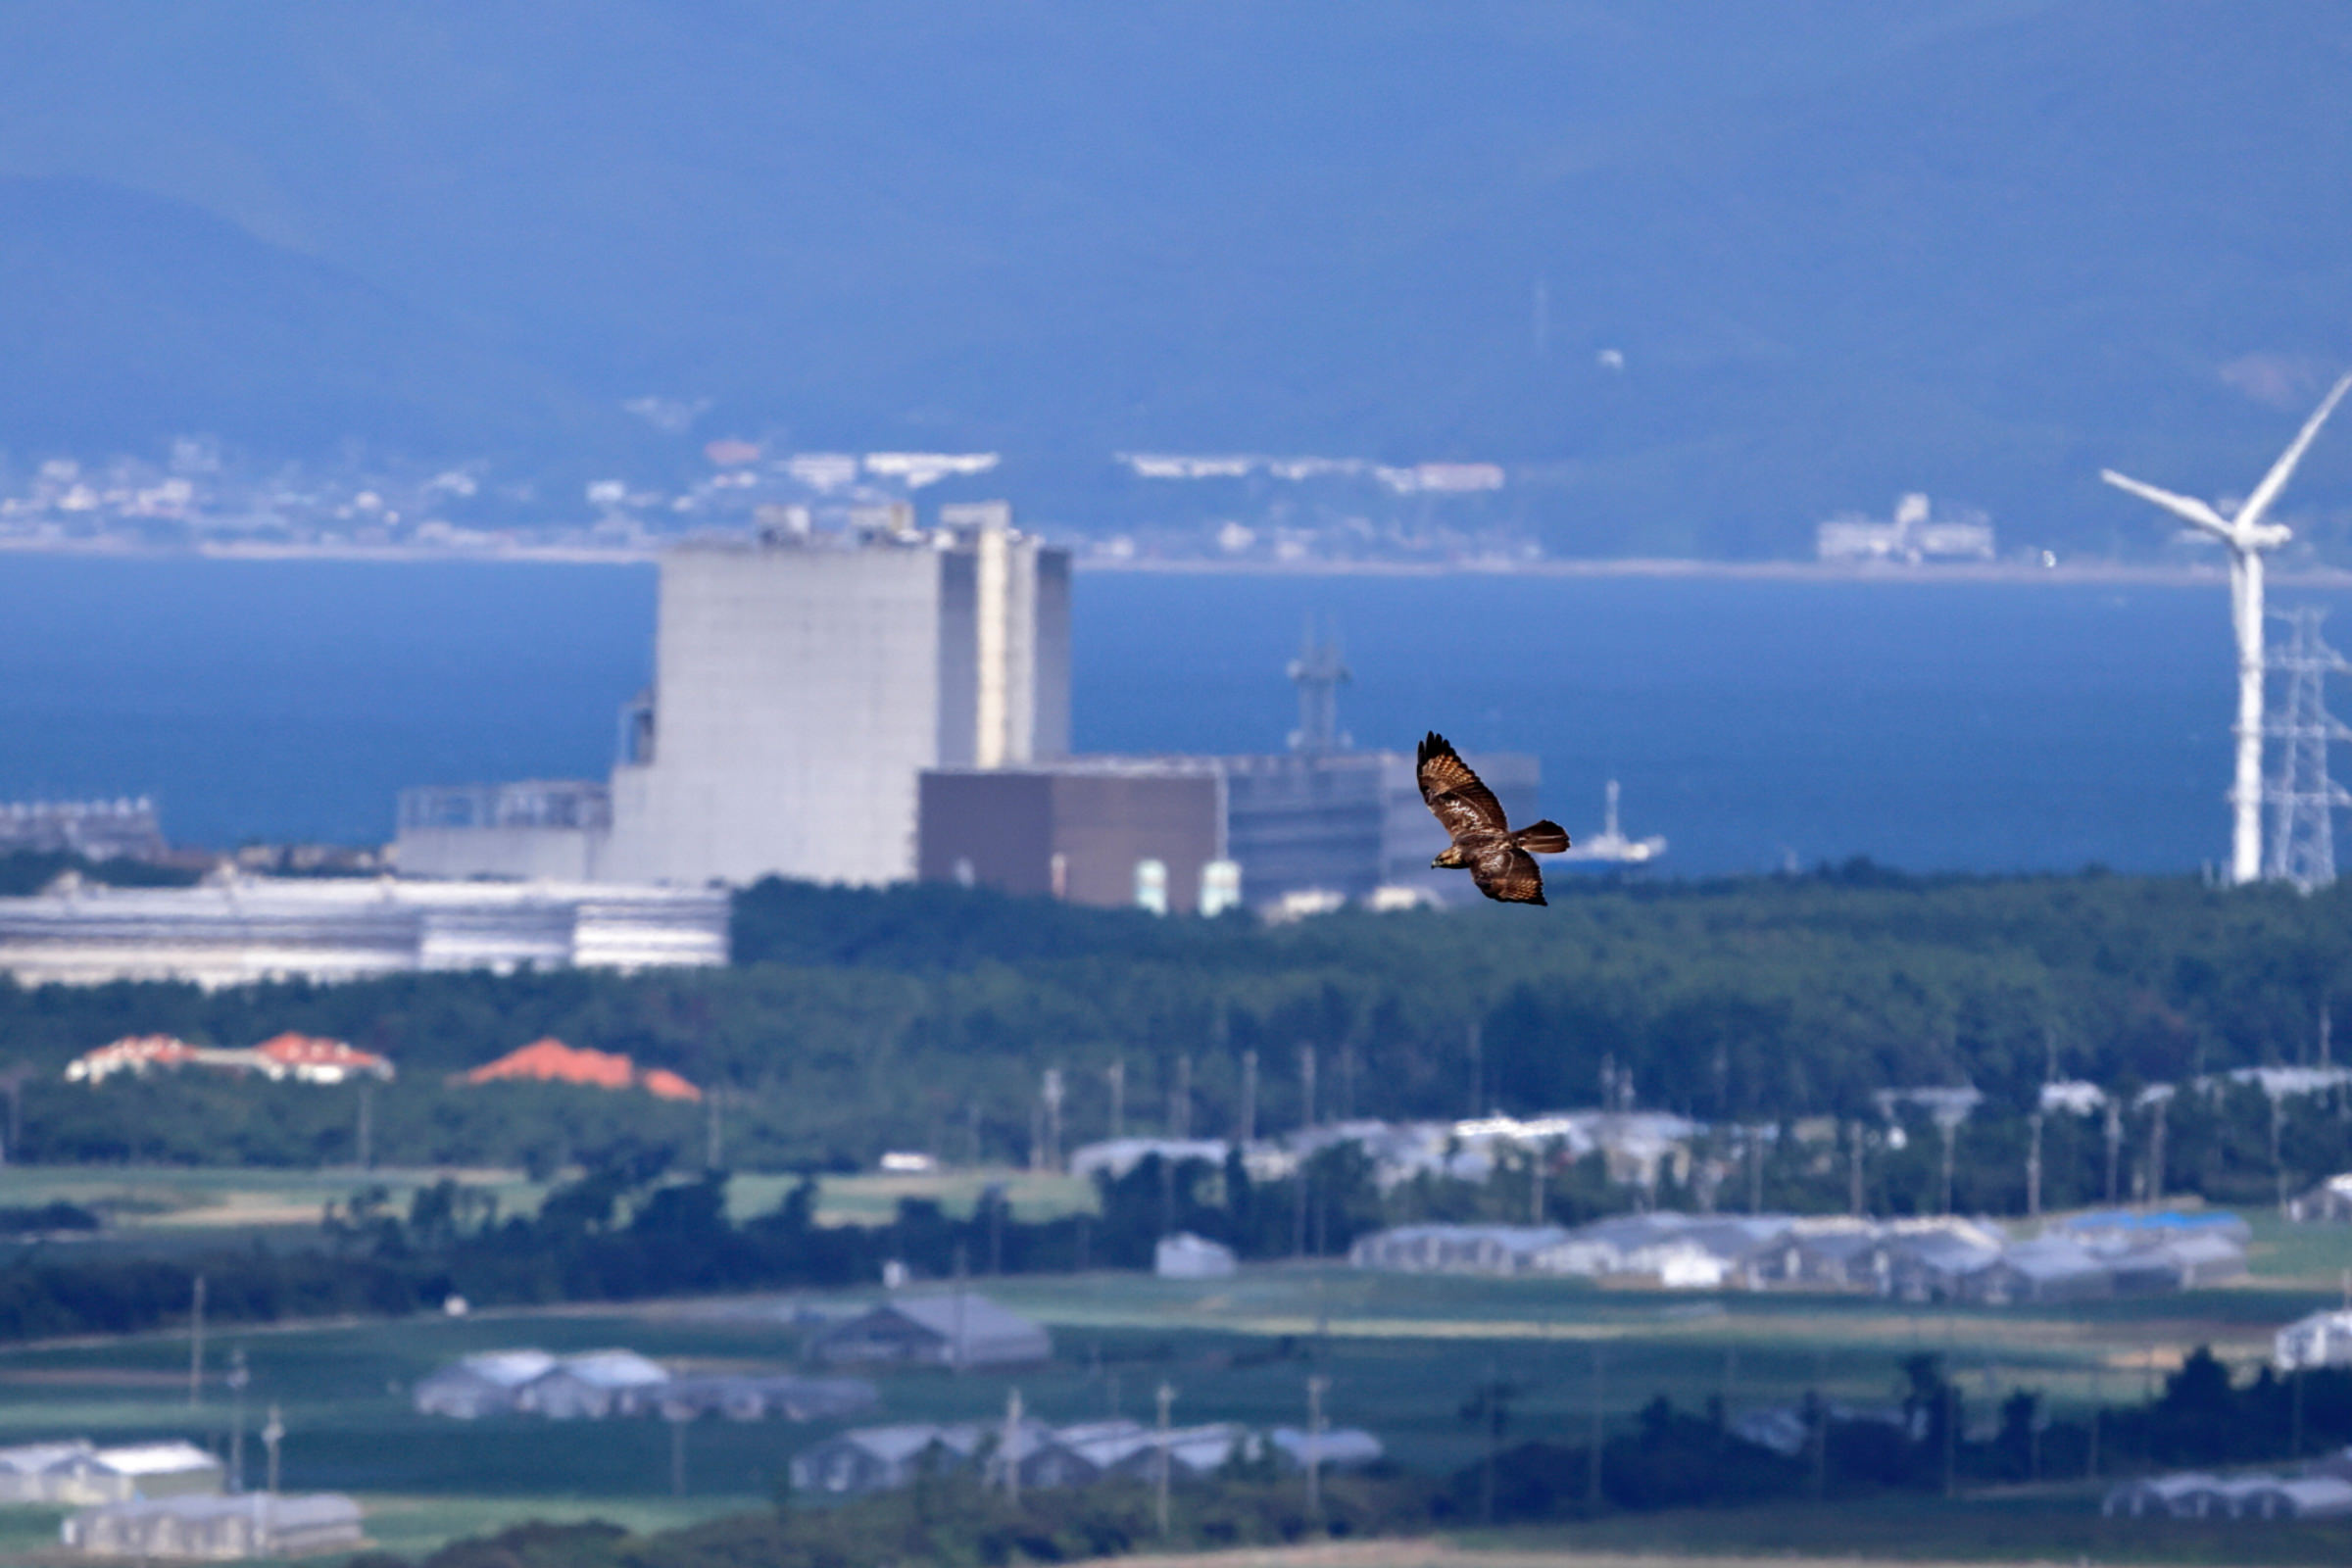
Image data
  • Aperture value: f/11
  • Shutter speed: 1/4000 second
  • ISO speed: ISO2500
  • Focal length: 800mm
  • Mirrorless Camera
  • AF subject setting: Animals

Share: “How to photograph wild birds: Lesson 25”

  • Share on Facebook
  • Share on twitter
  • Share on Google+
  • Pinterest
  • Send via LINE

Pro technique using Animals and Eye AF settings

image

It is probably safe to say that wild bird photography is more challenging than any other genre. The reason is the difficulty focusing with a telephoto lens that narrows depth of field since the subject is not only small and moves frequently but is also often difficult to get close to. Recently however, great advancements have been made in AF (autofocus) functions, and the latest mirrorless cameras masterfully take care of the technical side for you according to the required settings you select in advance.


“Animals” + “Face + Tracking AF” = Track bird's eye with Eye AF

image

To explain using Canon's signature mirrorless camera model as the example, select SERVO for the AF operation setting, then select Face + Tracking AF for the AF method, set Animals as the Subject to detect, and finally, set Eye detection to Enable and Continuous AF to Disable.
While it also depends on the size of the bird or the situation, focus on the bird's eye by pressing the shutter button halfway down or pressing the <AF-ON> button with your thumb, and when the camera recognizes the eye, it will stay locked on the bird's eye within the frame even if you move the camera.

  • image
    Select SERVO for the AF operation setting
  • image
    Select Face + Tracking AF for the AF method
  • image
    Set Animals as Subject to detect
  • image
    Set Eye detection to Enable

Prioritizing composition becomes easier

image

Until now, taking photos with the priority on composition involved choosing a single point or surrounding points for the AF setting and moving the position of the point(s) within the frame, or focusing on the center and then adjusting the composition after engaging the AF lock. With mirrorless cameras that have an Eye AF function, you can continuously keep focused on the eye of a moving bird when combined with Eye SERVO AF. Thanks to this, taking photos with the priority on composition becomes easier for the photographer. In other words, it frees you from the worry of having to focus perfectly on the bird's eye, allowing you to concentrate on arranging the composition.

Confirm focus on the eye, then arrange the composition

Small birds come to nearby parks when autumn arrives. On this occasion the bird seemed to favor a Japanese cherry tree, using it often as a perch for hunting insects with a flying-catch maneuver. When it perched in a spot with colored leaves, I pressed the <AF-ON> button and the camera quickly focused on the eye of the Asian Brown Flycatcher. Since the eye stayed in focus even when I moved the camera, I was able to get a shot with the priority on composition.

Aperture value:
f/8
Shutter speed:
1/1600 second
ISO speed:
ISO500
Focal length:
500mm
Mirrorless Camera
(35mm full-frame image format)
AF subject setting:
Animals
image
Viewfinder display
Asian Brown Flycatcher
Enlarge

A Red-flanked Bluetail had a branch that it liked. After waiting some time, it came and perched on it. Using Eye AF, I locked on the body of the Bluetail while making the focus points in the middle of the frame flash, and the Eye AF quickly focused on the bird's eye. The focus stayed fixed on the eye of the Red-flanked Bluetail. I moved the camera slightly to adjust the composition and took the shot.

Aperture value:
f/7.1
Shutter speed:
1/1000 second
ISO speed:
ISO1600
Focal length:
500mm
Mirrorless Camera
(35mm full-frame image format)
AF subject setting:
Animals
image
Viewfinder display
Red-flanked Bluetail
Enlarge

Things to note depending on the situation

image

The Animals AF subject setting and Eye AF are very effective when the subject is relatively close, there are no obstructions around it, and you can distinguish the bird's eye. However, there are times when a bird will hide in the grass or in the branches of a tree to protect itself from predators. When the subject is perched or not moving around much, it would be best to focus the shot within the frame using a single AF point or surrounding points.

Targeting a bird in the trees with Spot AF

A Crested Serpent Eagle perched on a branch leisurely preening itself. Since there was a possibility that Eye AF would focus on the surrounding flowers or leaves, I decided to use Single-point Spot AF that would keep the focus fixed on the Crested Serpent Eagle's face.

Aperture value:
f/10
Shutter speed:
1/1000 second
ISO speed:
ISO2500
Focal length:
700mm
Mirrorless Camera
(35mm full-frame image format)
AF subject setting:
Animals, Single-point Spot AF
image
Viewfinder display
Crested Serpent Eagle
Enlarge

When the bird is in flight, lock on the face and adjust to unpredictable situations

An Eastern Buzzard was flying with the cityscape in the background. Previously, with this type of scene, the focus would be on the objects in the background, but it was significantly improved now. If you focus on the bird when the sky around it is clear, you can successfully track the subject without losing the focus. The focus will stay on the bird if the bird is small in size and moving. or will stay on the bird's eye if it is large and moving. Actually, As long as the bird stayed in the frame the focus would stay on it, so I was able to capture it in an ideal setting.

Aperture value:
f/11
Shutter speed:
1/2000 second
ISO speed:
ISO500
Focal length:
600mm
Mirrorless Camera
(35mm full-frame image format)
AF subject setting:
Animals
image
Viewfinder display
Eastern Buzzard
Eastern Buzzard
Eastern Buzzard
Enlarge

mr. tozuka’s sidebar

Prevent failed shots with exposure simulation

The biggest difference between a SLR camera and a mirrorless camera is having mirrors or not. Mirrorless cameras have a function that enables you to confirm how close the brightness of the image appearing in the viewfinder display or the LCD monitor is to the actual exposure, and in most mirrorless cameras this is a default setting that is turned on. With SLR cameras, you had to check the brightness of the image after taking the shot and adjust the exposure. Because of that, a certain amount of skill and preparation was needed, such as taking test shots to prevent failed shots. Since with the exposure simulation function of mirrorless cameras the brightness of the image that you see in the viewfinder is exactly what you will get, you can decide the best exposure while looking through the viewfinder as you take the shot.

image
Viewfinder display
In this photo, reacting to the darkness of the background the Black-winged Stilts were more likely to be overexposed, but by adjusting the brightness while confirming it with my eye through the viewfinder I was able to get the shot that I wanted.
Black-winged Stilt
Black-winged Stilt
Black-winged Stilt
Enlarge

Aperture value:
f/14
Shutter speed:
1/800 second
ISO speed:
ISO400
Focal length:
1000mm
Mirrorless Camera
(35mm full-frame image format)
AF subject setting:
Animals, Single-point Spot AF