how to
photograph
wild birds

Using the always handy “Back-Button AF” for bird photography

There are two ways to focus on a subject: using the shutter button or the <AF-ON>(AF start) button. In bird photography, pressing the button with the right thumb to focus is the better choice. This method is commonly called “back-button AF”. Lets learn the differences and master back-button AF.
Image
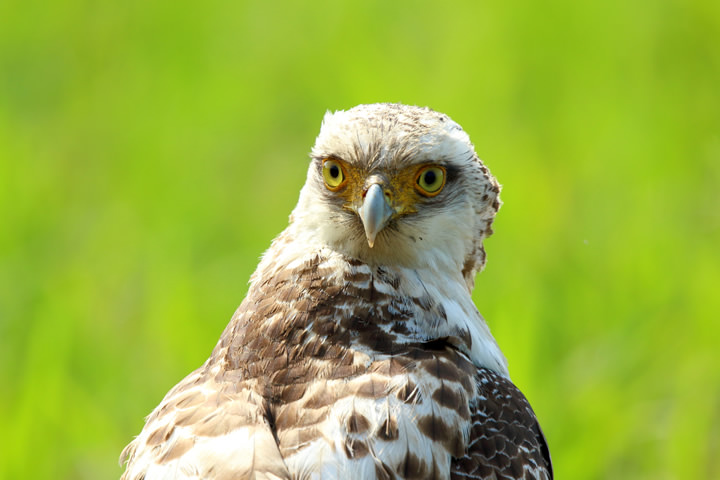
Crested Serpent Eagle
Enlarge

Because I was able to get close to this juvenile Crested Serpent Eagle, I used a 2x extender to take a medium close-up shot. Thinking of the balance, I focused on the eyes with the <AF-ON> button. Then, I took my thumb off to lock the focus and concentrated on the composition while I shot (AI Servo AF).

Image data
  • Aperture value: f/8
  • Shutter speed: 1/500 second
  • ISO speed: ISO400
  • Exposure compensation: +1.3
  • Focal length: 1000 mm equivalent
    (using a 2x extender at 500 mm)
  • DSLR Camera (APS-C image format)
Share: “How to photograph wild birds: Lesson 12”

  • Share on Facebook
  • Share on twitter
  • Share on Google+
  • Pinterest
  • Send via LINE

Focusing by pressing the shutter button halfway is not recommended when using AI Servo AF

Image

The AI Servo AF mode is appropriate when shooting soaring or vigorously animated birds because it reacts to instantaneous movements and automatically maintains focus. However, if you engage AF by pressing the shutter button halfway, the focus will drift to other objects as you recompose the shot so that you never get the shot you want.

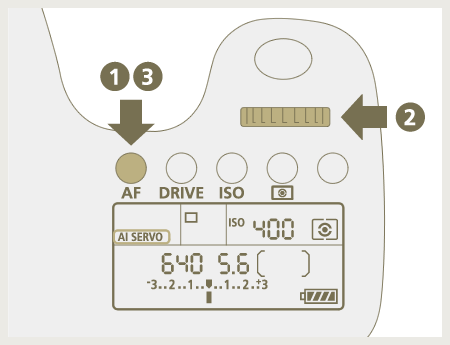
1 Press the <AF> button and rotate the Main Dial to select AI SERVO. Then press the <AF> button again.

Image
Change the AF mode

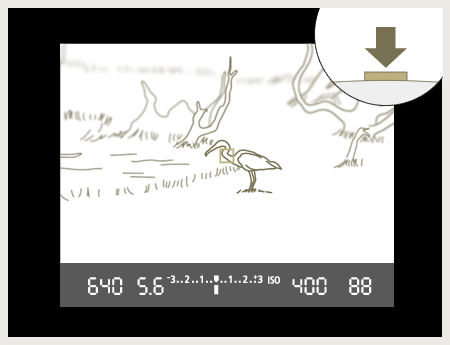
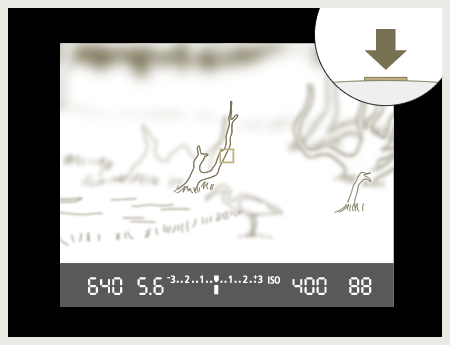
2 Position the subject in the center of the viewfinder. Press the shutter button halfway to focus.

Image
Press the shutter button halfway to focus

3 From there, change the composition. When you go to press the shutter button all the way, you will find the focus has automatically locked on the trees in the center background.

Image
When you go to press the shutter button all the way, the focus locks on the object in the center of the frame resulting in a failed photo

More focusing freedom with back-button AF and AI Servo AF

Image

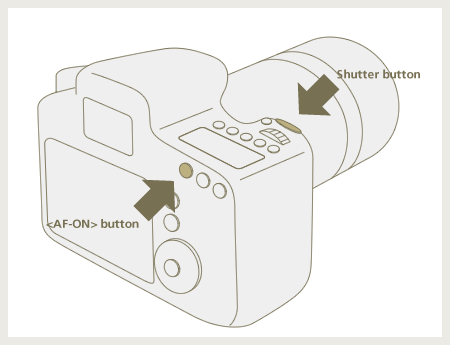
The factory-default setting on cameras enables focusing by pressing the shutter button halfway. But there is another way to engage autofocus, commonly called “back-button AF.” It involves pressing the <AF-ON> button on the rear of the camera with the right thumb. When this method is activated, you engage and disengage the autofocus by pressing the <AF-ON> button, so the shutter button's purpose is just to release the shutter. (Pressing the shutter button halfway will not focus the camera.)

Separating the controls for autofocus and shutter release lets you recompose and take photos even in AI Servo AF mode. While the <AF-ON> button is held down, the camera will continue to focus on the subject. Releasing the <AF-ON> button will lock the focus, allowing you to adjust the composition in the same way as the One-Shot AF mode.

Many amateur photographers are not aware of back-button AF. They wind up using One-Shot AF exclusively, finding AI Servo AF inconvenient because they can't recompose shots without the AF focusing on the wrong object. This is a real shame, as they are missing out on 90 percent of the camera's performance when shooting birds.


My camera doesn't have an <AF-ON> button

Many mid-range and high-end models have a dedicated button, but entry-level models do not. It is possible to assign the AF-ON function to the button marked with an asterisk. The way to assign the AF-ON function varies between cameras. Please refer to your camera's user manual for instructions.

Image

Settings to activate back-button AF

Image

The factory-default setting enables focusing by pressing the shutter button halfway. The Custom Controls function is used to activate back-button AF. When activated, the autofocus function is removed from the shutter button, so that the shutter button functions only to trigger the flash and release the shutter.

1 Press the <MENU> button to view the menu list.

Image
<MENU> button

2 Rotate the Main Dial and select the tab. (On some models, select the Custom Function tab and proceed to Step 4, skipping Step 3.)
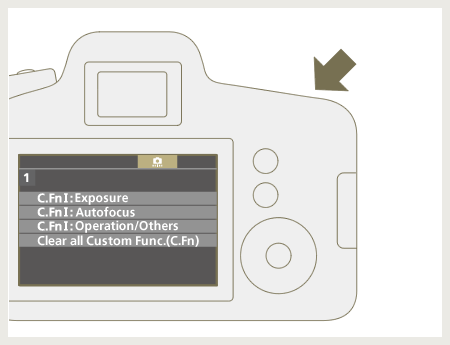
Image
Select the tab with the Main Dial

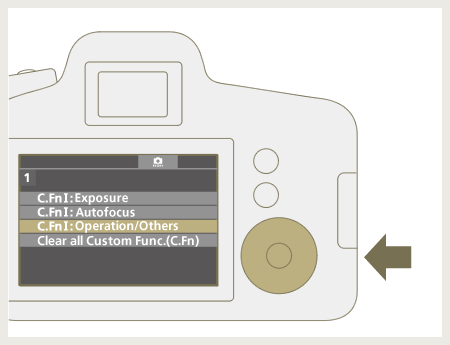
3 With the Quick Control Dial or Multi-controller, select Operation/Others and press the <SET> button.

Image
Select Operation/Others

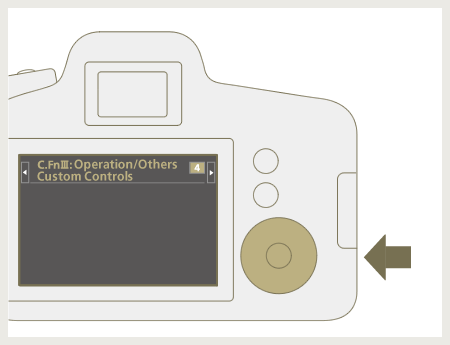
4 With the Multi-controller, select Custom Controls (on the fourth page when using the EOS 80D) and press the <SET> button.

Image
Select Custom Controls

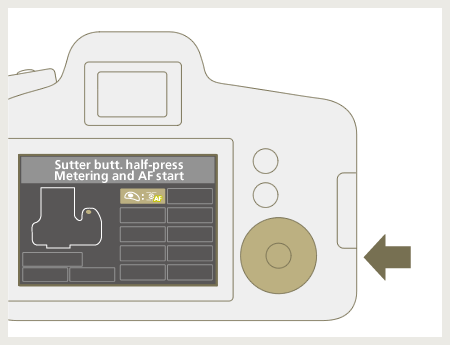
5 A list of the control buttons will appear. With the Multi-controller, select Shutter butt. half-press and press the <SET> button.

Image
Select Shutter butt. half-press

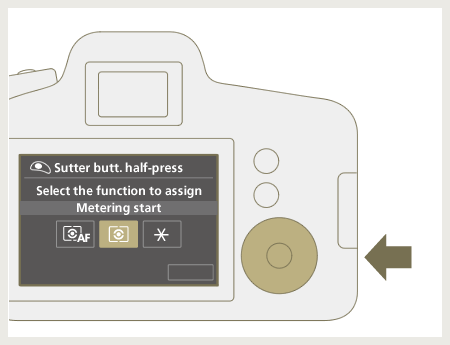
6 Metering and AF start will be selected by default. Change the setting to Metering start and press the <SET> button.

Image
Change to Metering start

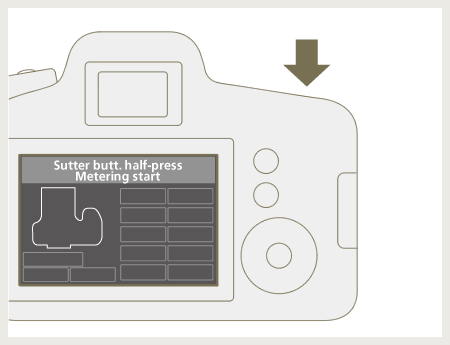
7 Half-press the shutter button to close the menu display.

Image
Press the shutter button halfway

How to shoot with back-button AF and AI Servo AF mode

Image

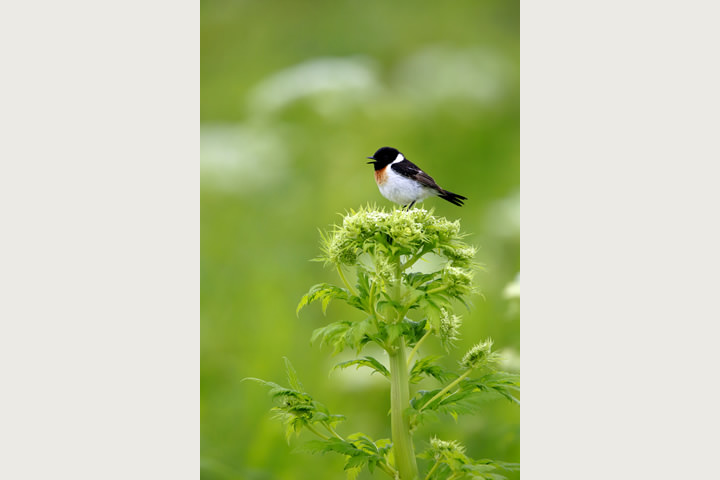
Example 1: Photographing a small chirping bird perched on a flower

I came across a male Common Stonechat chirping while perched on a flower bud. My camera was set to AI Servo AF mode in preparation for birds in flight, but with back-button AF I could concentrate on shooting this stationary bird without having to switch to One-Shot AF.

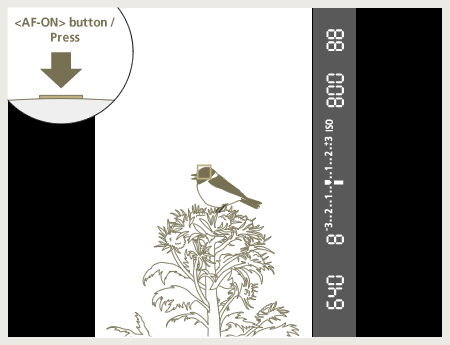
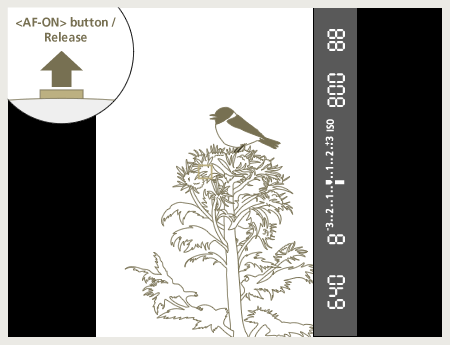
1 Position the subject in the center AF Point in the viewfinder and focus with the <AF-ON> button. (If it is hard to place the subject in the center, change the AF Area selection setting. Changing this setting will be covered in a later lesson.)

Image
Focus with the <AF-ON> button

2 Releasing your thumb from the <AF-ON> button will lock the focus. You can now recompose the shot without the focus drifting to get a shot that emphasizes the composition. When you are satisfied, press the shutter button all the way.

Image
Release the <AF-ON> button, adjust the composition, and press the shutter button all the way
Common Stonechat
Common Stonechat
Common Stonechat
Enlarge
  • Aperture value: f/8
  • Shutter speed: 1/640 second
  • ISO speed: ISO800
  • Exposure compensation: 0
  • Focal length: 1000 mm equivalent
  • (using a 2x extender at 500 mm)
  • DSLR camera (35mm full-frame format)


Example 2: Capturing a bird in flight

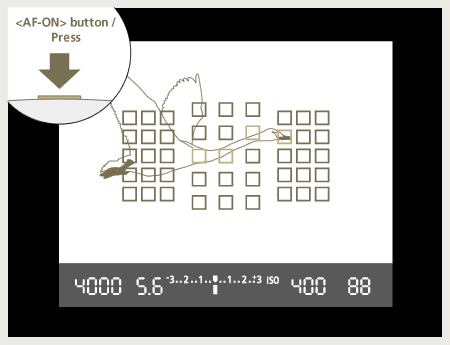
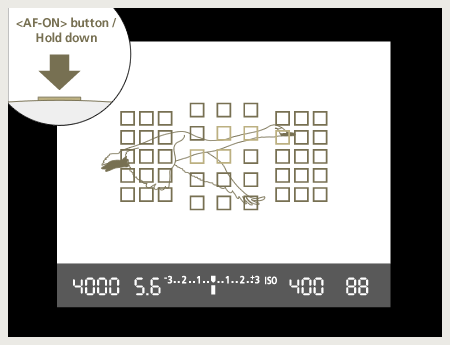
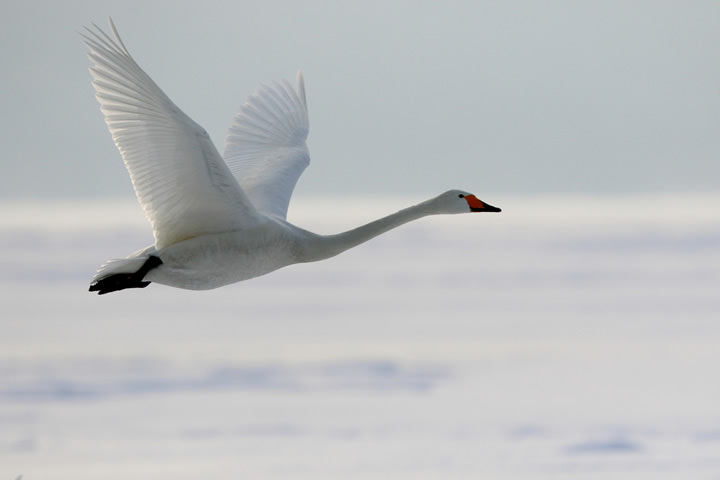
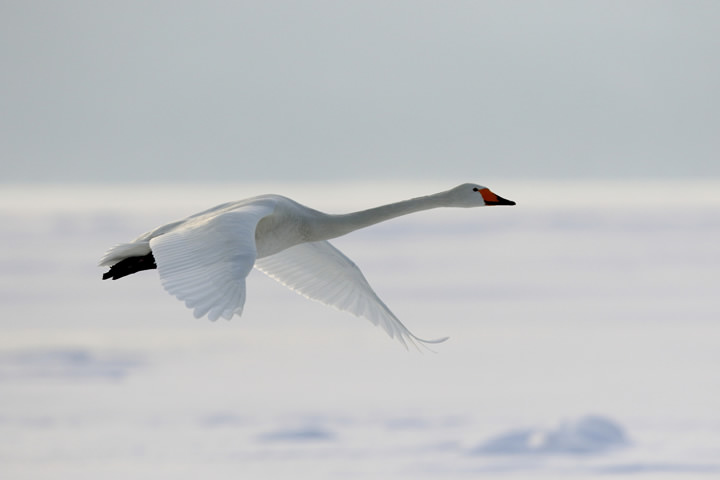
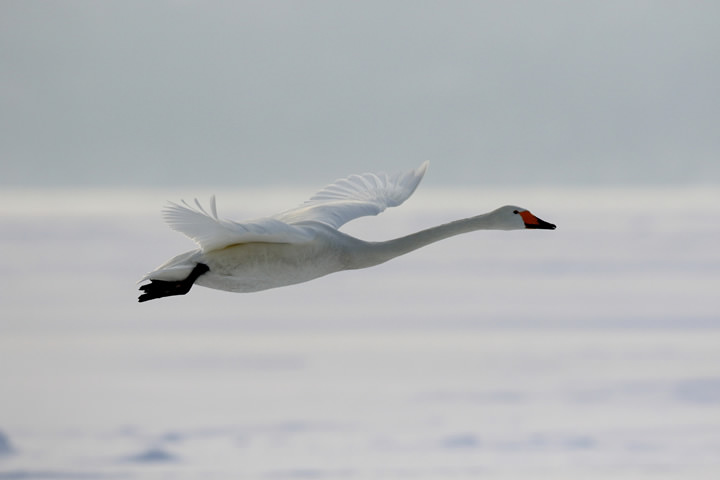
I spotted a Whooper Swan taking off. Because my camera was set to the AI Servo AF mode, by pressing and holding the <AF-ON> button, the camera kept the Whooper Swan in focus. I waited until the bird was sufficiently large in the viewfinder and then snapped a series of shots.

The secret here is spotting a bird in flight somewhat far off. If you can get the subject in the viewfinder coming toward the lens, pressing the <AF-ON> button will focus automatically. Holding the button will keep the subject in focus as it moves. When the subject gets sufficiently large and in the right position in the viewfinder, press the shutter button with the <AF-ON> button held. This way, you can take a series of shots, each in focus.

1 When the subject enters the viewfinder, focus with the <AF-ON> button. (The camera will continue to focus on the subject as long as the button is held.)

Image
Press the <AF-ON> button when the subject enters the frame

2 Press the shutter button and release the shutter while holding the <AF-ON> button down.

Image
Press the shutter button while holding down the <AF-ON> button

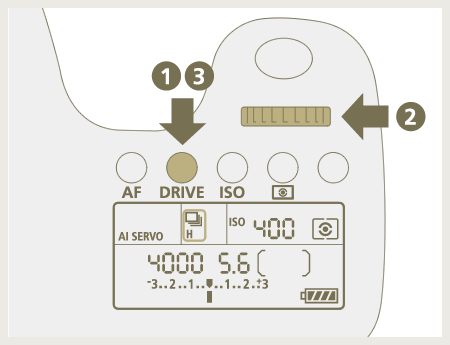
3 If the camera is set to the continuous shooting mode, you can take a series of shots as long as the shutter button is held down. Press the <DRIVE> button and rotate the Main Dial to select the continuous shooting mode. Then press the <DRIVE> button again.

Image
Setting the continuous shooting mode
Whooper Swan
Whooper Swan
Whooper Swan
Enlarge
  • Aperture value: f/5.6
  • Shutter speed: 1/4000 second
  • ISO speed: ISO400
  • Exposure compensation: 0
  • Focal length: 500 mm
  • DSLR camera (APS-C image format)
Whooper Swan
Whooper Swan
Whooper Swan
Enlarge
Whooper Swan
Whooper Swan
Whooper Swan
Enlarge

Comment from a learner

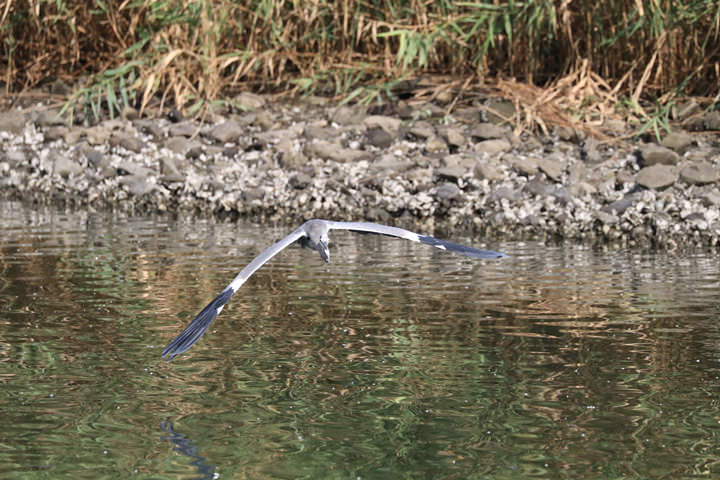
This Grey Heron came flying right at me. After focusing with back-button AF, I snapped consecutive shots while concentrating on keeping the bird in the frame. As expected, the focus did not drift each time I pressed the shutter and the consecutive shooting felt fluid and natural.

Camera settings
AF operation: AI Servo AF + AF Area: Automatic selection AF

  • Grey Heron, by a learner
    Grey Heron, by a learner
    Grey Heron, by a learner
    Enlarge

    Aperture value:
    f/5.6
    Shutter speed:
    1/8000 second
    ISO speed:
    ISO1600
    Exposure compensation:
    -1
    Focal length:
    340 mm
    DSLR camera (APS-C image format)

Message from Mr. Tozuka

This is a very tough shot with the bird coming straight at you. By using AI Servo AF and Automatic selection AF, the focus stays on the head of the Grey Heron as it approaches the camera.