 |
 |
|
|
|
|
|

 |
 |
 |
Ensure that Digital Photo Professional Ver. 3.1 or later is installed. |
 |
 |
If installed: → proceed to Step 2. |
 |
| If not installed: → |
Requires installation of Digital Photo Professional Ver. 3.1 or later. |
|
|
 |
 |
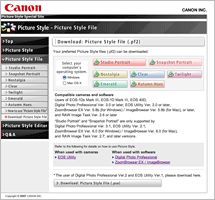
Download your favorite Picture Style files to your computer. |
 |
 |
 |
Download: Picture Style file |
|
|
 |
 |
Using Digital Photo Professional to apply a Picture Style File to a RAW image.
| * |
The following use window examples from Windows Vista for explanation,
but basic operations are the same as in other Windows OSs or Mac OS X. |
|
 |
| 1. |
Start Digital Photo Professional to display a RAW image. |
| 2. |
Select a RAW image to apply Picture Style file.
Double-click on the image or select the image and switch to [Edit image] window.
| → |
[Edit] window and tool palette appear. |
|
|
 |
Digital Photo Professional |
|
 |
 |
| 3. |
Check if the [RAW] tab is selected. |
|
Edit |
Tool palette |
| 4. |
Click on [Browse] on the tool palette in the [RAW image adjustment] window.
| The [Open] window appears. |
|
|
|
 |
 |
| 5. |
Open the location where you have saved Picture Style files, select the desired file to capture, and click the [Open] button. |
|
 |
Open |
|
 |
 |
| 6. |
The Picture Style file is loaded and reflected in the developed image.
|
[Befor] |
 |
[After] |
|
|
|
 |
| * |
Only one Picture Style file can be loaded for one RAW image. If you want to develop another RAW image with any other Picture Style file, you can repeat No. 4 for the file. |
|
 |
 |
 |
 |
|