 |
 |
|
|
|
|
|

 |
 |
 |
Ensure that EOS Utility Ver. 2.6
or later is installed. |
 |
 |
If installed: → proceed to Step 2. |
 |
If not installed: → first install
EOS Utility Ver. 2.6 or later. |
|
 |
 |
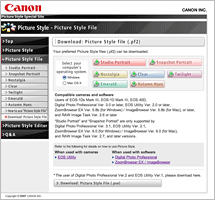
Download your favorite Picture Style files to your computer. |
 |
 |
 |
Download: Picture Style file |
|
|
 |
 |
Select the communication setting on your camera.
| * |
For EOS-1Ds Mark III, EOS-1D Mark III, EOS 7D, EOS 50D, EOS 40D, EOS 500D, EOS REBEL T1i, EOS 450D, EOS REBEL XSi, EOS 1000D, EOS DIGITAL REBEL XTi, EOS REBEL XS, EOS 400D DIGITAL, or EOS DIGITAL REBEL XT, communication setting is not necessary. |
|
 |
For EOS 5D, set [Communication] to [PC connect.] in the menu.
For EOS 30D, set [Communication] to [Print/PC] in the menu. |
| EOS 5D |
|
|
 |
 |
Start EOS Utility.
| * |
The following use window examples from EOS Utility Ver. 2.6 to explain. For EOS Utility Ver. 2.5 or previous versions, windows and operations will differ. |
| * |
The following use window examples from Windows Vista with EOS 50D to explain, but basic operations are the same as in other Windows OSs or Mac OS X. |
|
 |
| 1. |
Connect the EOS DIGITAL camera to the personal computer via a USB cable, and start up EOS Utility. Click “Camera settings/Remote shooting” on the main window. |
|
 |
EOS Utility
|
|
 |
 |
| 4. |
Select one of “User Def. 1~3” in “Register Picture Style File”.
| * |
If a Picture Style file has already been registered under the same setting number, the existing setting will be overwritten. |
|
|
 |
Register Picture Style File |
| 5. |
Click  . .
|
|
 |
Register Picture Style File
|
|
 |
 |
| 6. |
Select a Picture Style file (extension .pf2). |
|
 |
Open
|
| 7. |
Click “OK”.
| • |
If you have other downloaded Picture Style files,
apply them to [User Def. 2] and [User Def. 3] by repeating Steps 3 to 7. |
|
|
 |
Register Picture Style File |
|
 |
 |
| 8. |
Before applying the file, you can also adjust parameters such as [Sharpness], [Contrast], [Saturation], and [Color tone] by clicking “Detail set.” |
|
 |
Shot setting |
| [ Sharpness ]
|
 |
[ Contrast ]
|
 |
[ Saturation ]
|
 |
[ Color tone ]
|
|
 |
| * |
After registering the Picture Style file in the camera, we will recommend to confirm the Picture Style setting on the camera side.
(Please see the camera's manual about the method of setting the Picture Style in the camera.) |
|
|
 |
 |
 |
 |
|