 |
 |
|
|
|
|
|
|
|
Picture Style Editor creates an original
Picture Style file based on the RAW image captured with an EOS DIGITAL camera. At first, open the RAW image and begin the work from the preparation procedure.
|
| *"Picture Style Editor Ver.1.0" corresponds to
only the RAW image captured with EOS 40D. |
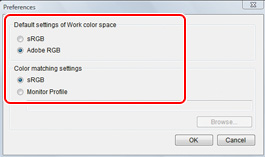
Adobe RGB is recommended as the work
color space of Picture Style Editor
To draw out the data recorded in EOS DIGITAL further, "Adobe RGB" is recommended as a setting of the work color space. |
|
|
|
 |
|
Firstly, open "Preferences" and set the same settings for "Default settings of Work color space" and "Color Management Setting" with Digital Photo Professional. This is an indispensable matter to display the image with the same colors between the different software. |
|
|
 |
|
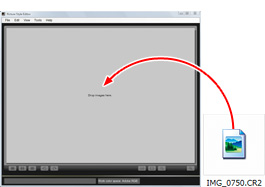
An image is shown after dragging and dropping in the RAW image on the main window.
Dragging and dropping is also possible from the main window of Digital Photo Professional while confirming the image. |
|
|
| *The content (recipe data) edited with Digital Photo Professional is not reflected in Picture Style Editor. |
|
|
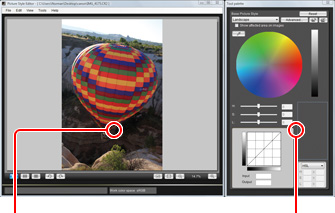
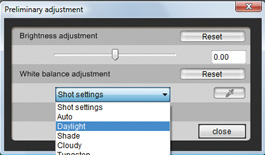
It is important that white balance and exposure of the adjustment image is set properly. After the adjustment is completed by "Preliminary Adjustment" function, proceed to work with the tool palette. |
|
|
|
 |
1 Select the photo to be adjusted |
|
|
|
|
|
|
|
|
