 |
 |
|
|
|
|
|
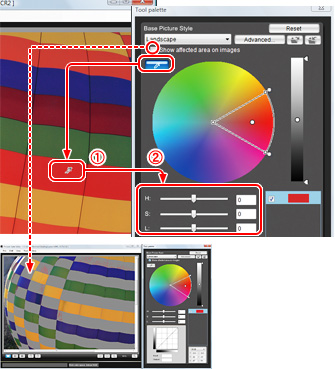
| When "Show affected area on images" is checked, the part that changes by the operation is indicated in gray. |
|
|
 Click on the image where you want to make an adjustment with the color picker and Click on the image where you want to make an adjustment with the color picker and  control Hue (H), Saturation (S), and Luminosity (L). control Hue (H), Saturation (S), and Luminosity (L).
The influenced color range and degree of change can be set individually. |
|
|
|
 |
|
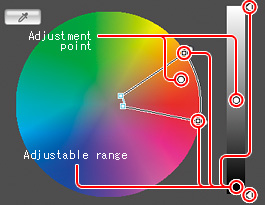
The area of application can be controlled within an arc on the color wheel, as well as on the lightness gradation bar. |
|
|
 |
|
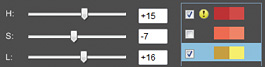
| By dragging HSL slider, decide the adjustment and confirm the color change on the screen. |
| When the HSL slider is moved, the adjustment point on the color wheel is moved, as well as the color in the list is changed. Not to fail the color tone as photograph, the movable range in the slider is limited by the chosen color (adjustment point). |
|
|
|
|
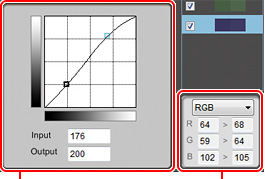
| Color change can be confirmed by the numeric value of HSL, Lab, and RGB |
|
|
|
Up to 100 colors adjustment points can be made. Moreover, minor adjustment of lightness and contrast can be added using the tone curve. |
|
|
|
 |
3 Adjust the color details |
|
|
|
|
|
|
|
|
