 |
 |
|
|
|
|
|
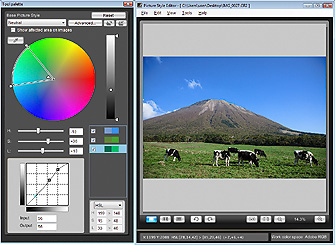
| "Neutral", which offers slightly less contrast, is selected as the base Picture Style, so the contrast of the highlights is inadequate. |
|
As the finishing touch, the gradation sequence is adjusted.
"Neutral", which was selected as the base Picture Style, reproduces colors without exaggeration, and retains gradation sequence without saturating the colors even for subjects with naturally high saturation and contrast. At the same time, it is very easy to use as a base Picture Style, but it seems to afford a slight lack of contrast in scenery as per this example. Contrast can simply be increased by setting the Picture Style details, but in this section, we set out to increase the brightness around highlight areas without changing shadowy areas and try to bolster the purity of the gradation sequence. The rich gradation sequence will not be lost as adjustments are made while preventing any increase in white blowout. A gradation sequence will be created for bright outdoor scenery. |
|
|
|
 |
|
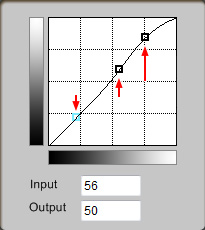
Decide on two points at the brighter side above the middle and one point in the shadow. Generally, points should be "S-shaped" while setting a slightly darker shadowy area, a slightly brighter mid-zone, with the brightest reserved for the highlights.
Tone curve influences all the edited colors, so if the edited results are unsatisfactory, you are recommended to make minor adjustments to each color after using the editing tone curve.
In this example, adjustments were made to increase contrast, but the dynamic range remains the same, as the upper and lower limits were not changed. |
|
|
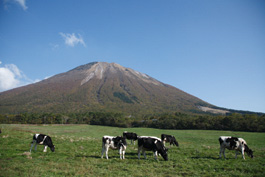
Before editing
|
|
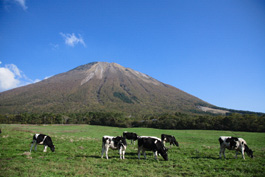
After editing
|
"Neutral" image before editing
When the original scenic photo is vivid and clear, Picture Style "Landscape" is too strong, and "Standard" does not sufficiently show the blue sky near highlights. |
|
Neutral-based "New Landscape" image after editing
The blue sky is decent without giving a picture-perfect impression, and the green looks natural with a sense of bright sunshine. This tailor-made "New Landscape" Picture Style file has been created with a different atmosphere from the original "Landscape". |
|
|
|
 |
Step 4: Enhancing overall gradation sequence |
|
|
|
|
|
|
|
|
