Developers’ Story
A unique measuring technology to solve problems at production sites
- Sparked by customer concerns
- Developing a new measurement method
- The organization
- Contributing to improved productivity
A desire to do something about a customer issue: How an engineer’s idea helped improve the production line
Production lines in factories always pursue higher productivity, which is why automation is often
implemented. As a part of this automation, more and more factories have been introducing equipment to
measure the movement and speed of products and materials on conveyor belts. However, in some situations,
accurate measurements are not necessarily possible, resulting in poor processing and wasted materials.
Canon provided a solution to this problem by developing a contactless measuring device based on an
unprecedented concept.
Here, the engineer in charge discusses the challenges of developing the
measuring device, including the development of Canon's unique algorithm that processes as many as 4,000
images per second.
Sparked by customer concerns
Driven by the engineer’s strong commitment and inquisitive spirit
The development of Canon's Non-Contact Displacement Sensor was initiated due to a single issue on the manufacturing floor. Many automated production lines monitor and control the distance and speed of material being transferred to ensure precise material processing, such as pressing and cutting. There are two methods for doing this: contact and non-contact. The non-contact method prevents damage and fouling of the materials caused by direct contact with the sensor, as well as measurement errors caused by slipping and friction.
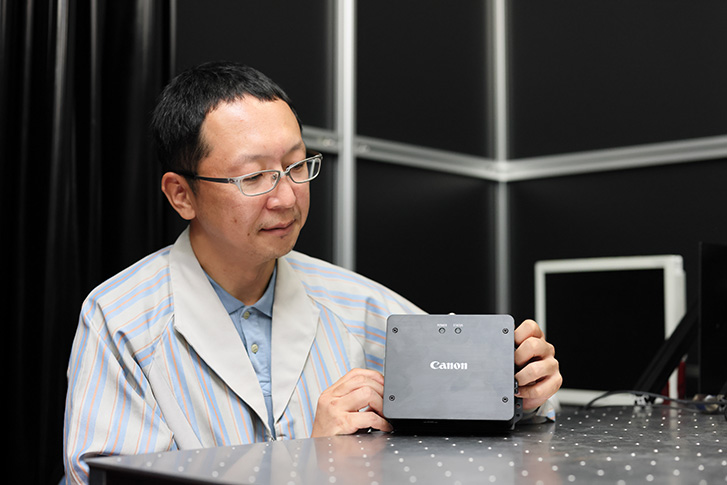
Takayuki Uozumi
Measurement System and Component Business Promotion Center
Mr. Uozumi joined Canon in 2006. He has extensive experience in the measuring equipment business and was involved with the Non-Contact Displacement Sensor from the initial stage of technology development process.
The most widely used non-contact method up until now has been the Laser Doppler system, in which light is applied to an object requiring measurement, and the amount of movement is calculated from the difference between the wavelengths of incident light and reflected light. This method can measure many kinds of materials and provides high measurement accuracy. However, it sometimes fails to measure accurately if the change of transfer speed and vibration, which often occur in the production line, are large. Defective products and production line stoppages occur in such cases. In addition, a Laser Doppler system is expensive, and it is difficult to adjust the position of installation.
These problems are very serious for factories already suffering from rising material costs.
During product maintenance and other occasions, we repeatedly heard directly from customers about their concerns. As an engineer, I wanted to solve this problem somehow.
The problem appealed to our inquisitive spirit as engineers. We started researching measurement technologies by poring over research papers and books, looking for insights.
Developing a new measurement method
Going beyond the limits of existing devices through profile matching
As our research progressed, it became clear that the conventional Laser Doppler system was unlikely to meet the requirements of customers, even with further improvement. I looked for other solutions, and eventually came upon a new measuring method called “profile matching.”
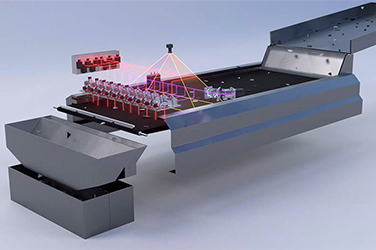
In profile matching, an LED light is shone onto a target object, and the image (profile) obtained from the reflected light is then “matched” to calculate changes in speed and distance moved. If we could obtain many profiles in real time and process them at high speeds, we would be able to achieve highly precise measurements even if there were sudden large changes to the conveying speed. The simple structure would make it more possible to create a smaller, lower-priced device.
The process of profile matching
A beam of light from an LED light source (①) is projected onto the measurement target (②), and the
returning (reflected) light (③)is captured by a line sensor (④).
The line sensor continuously
obtains a one-dimension image of the measurement target (⑤). The output pattern from the line sensor
changes with the change in speed and distance traveled by the measurement target (⑥).
By comparing
the patterns, similar parts of the patterns are found and, as a result, the difference between them is
detected. The difference is then used to calculate the amount of movement and the change of speed (⑦).
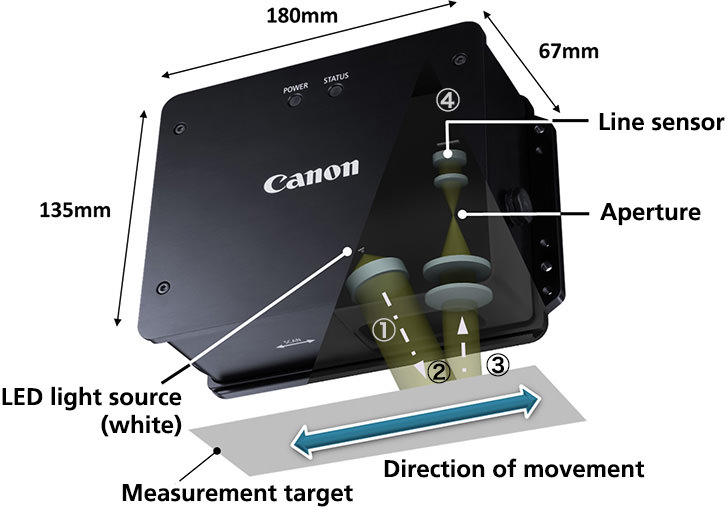
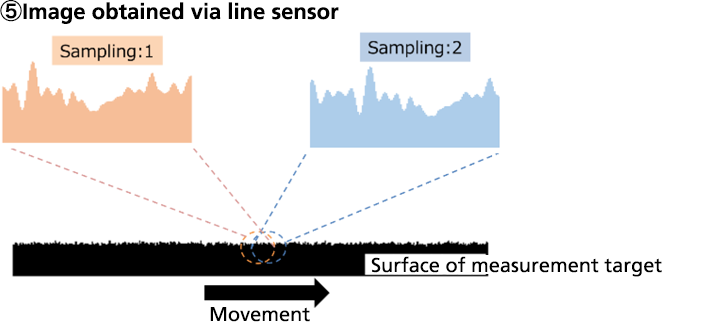
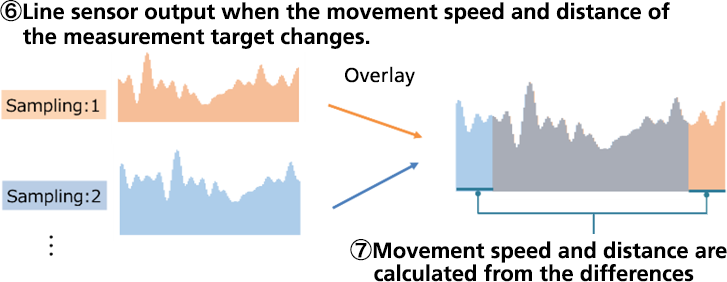
To solve the customer's problem, we bet on the potential of a profile matching method, and, as a result, developed a unique algorithm that can process 4,000 images per second and measure with precision in micrometers. It became possible to measure movement of up to 10 m/s accurately even with pitching and sudden deceleration and acceleration—at roughly half the price and size of existing equipment.
The organization
“This sounds interesting. Let’s try!”
When I thought that a measuring instrument with the new method could be commercialized, I proposed the development of the equipment to the team members. They immediately responded, “This sounds interesting. Let’s try!” In this department, it has always been easy to voice ideas to meet customers’ requirements. I think it’s because of Canon’s corporate culture, which welcomes proposals from staff regardless of their age or level of experience and makes it easy for them to do so.
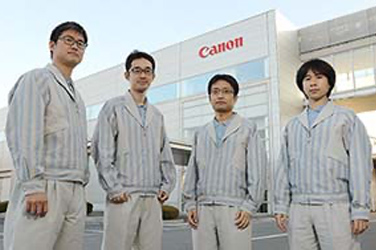
As this was a completely different measurement method from the existing, development required knowledge from different fields. Specialists from different fields—such as optical, electrical, mechanical, and software engineering—joined the development team, and we all worked very closely together to develop the product. This combination of strengths within the team helped us to improve the product’s capabilities and ultimately realize its commercialization.
The new Non-Contact Displacement Sensor developed using the profile matching method has helped to achieved reliable measurement accuracy in environments with sudden acceleration/deceleration and pitching, low cost, and ease of installation, all of which have been demanded from production sites. Only one parameter was needed to configure the sensor, and it was easy to incorporate into a production line. It also boasted a high level of usability and was practically maintenance-free. This helped to save on labor previously needed to operate and manage measuring equipment onsite. The sensor comes with dedicated software that collects and analyzes the measurement data, which contributes to streamlining production line management.
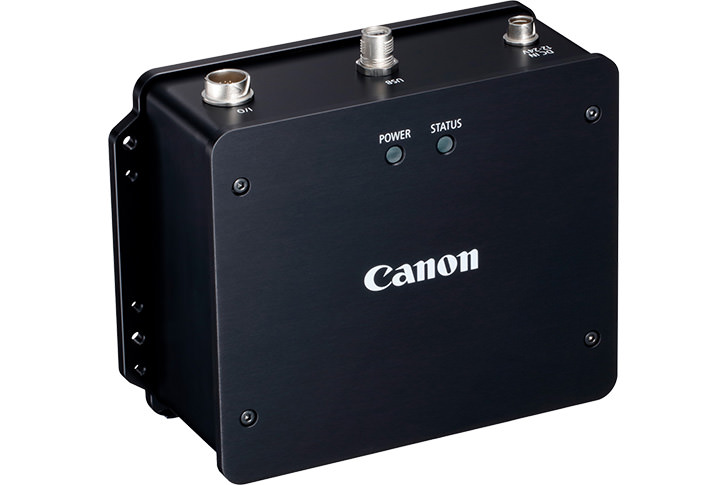
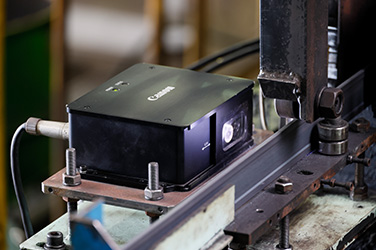
Small and compact at just 180×135×67 mm
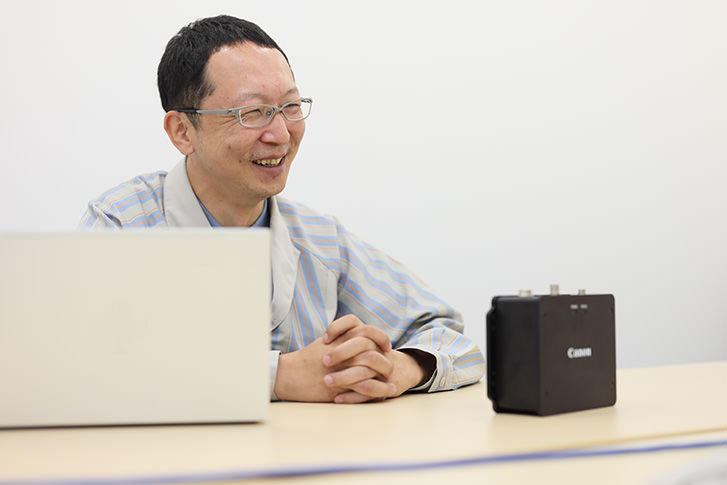
At Canon, we receive strong organizational support from our superiors, as well as customer-relation support. This creates an environment where engineers like me can concentrate on product development. Thanks to Canon’s technological capabilities and its open corporate culture, we were able to materialize our desire to develop new technology for solving customers’ problems into an actual commercialized product.
Contributing to improved productivity
Versatile applications from food to EVs
Canon’s Non-Contact Displacement Sensor measures a diverse range of materials including steel, paper, wire, building materials, textiles, and food products, and has been adopted by many companies including some based outside Japan. Canon's Non-Contact Displacement Sensor is being introduced not only at manufacturing sites, such as press lines for automobile parts, where it has been difficult to introduce them due to cost and the types of materials being transported, but also at production lines, such as those for electric vehicles and semiconductors, where even higher precision measurement is required. Its applications are expected to keep increasing.
Case study: Measuring coil materials in a pressing process. (Video length: 26 sec) * No audio
*In order to view videos, it is necessary to consent to the use of cookies by our website. If the videos are not displayed, please click the "Cookie Settings" and accept cookies.
A customer who implemented the Non-Contact Displacement Sensor told us that it reduced material wastage, which helped reduce their production costs. As engineers, we were delighted to see that it fulfilled our original objective. Apart from improving productivity and product quality, I think the reduction of wastage also helps the environment.
The Non-Contact Displacement Sensor offers stable, accurate measurement readouts regardless of the environment, making it perfect for production lines where material pitching, acceleration, and deceleration is unavoidable. This is why it is used in factories that manufacture gratings—the metal lids that cover roadside ditches.
Case study: The grating production process (Video length: 10 sec) *No audio
*In order to view videos, it is necessary to consent to the use of cookies by our website. If the videos are not displayed, please click the "Cookie Settings" and accept cookies.
Production sites also face major challenges with insufficient manpower and digital transformation. The Non-Contact Displacement Sensor provides value in these areas as well; not only does it reduce employees’ workload by being easier to manage and preventing production line issues, but the measurement data it collects can be used to promote the production lines in line with the advancement of IoT.
Canon’s technology offers many other possibilities as well. We will continue to take the initiative to hone our technological capabilities and to address our customers’ needs so that someday, people will think of Canon when they think of measuring instruments.


